Arduino Robot Arm
3D-printed, Arduino-powered robot arm for class project

Introduction
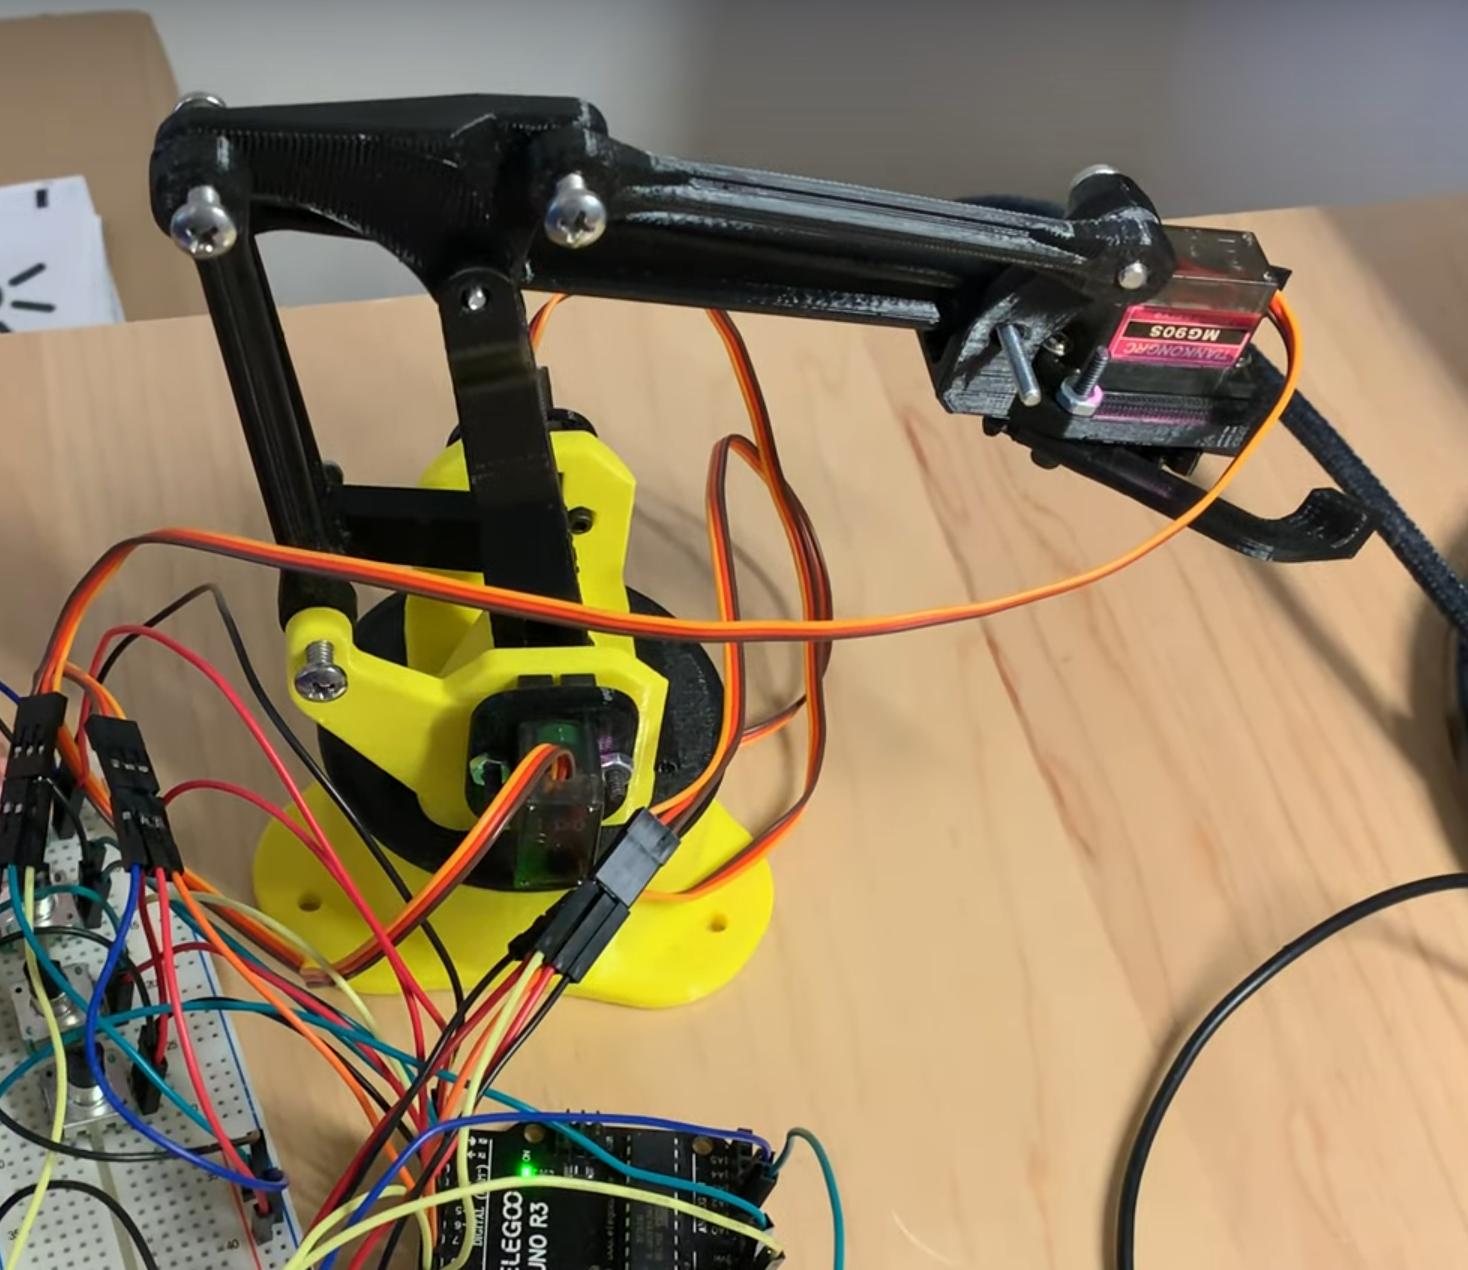
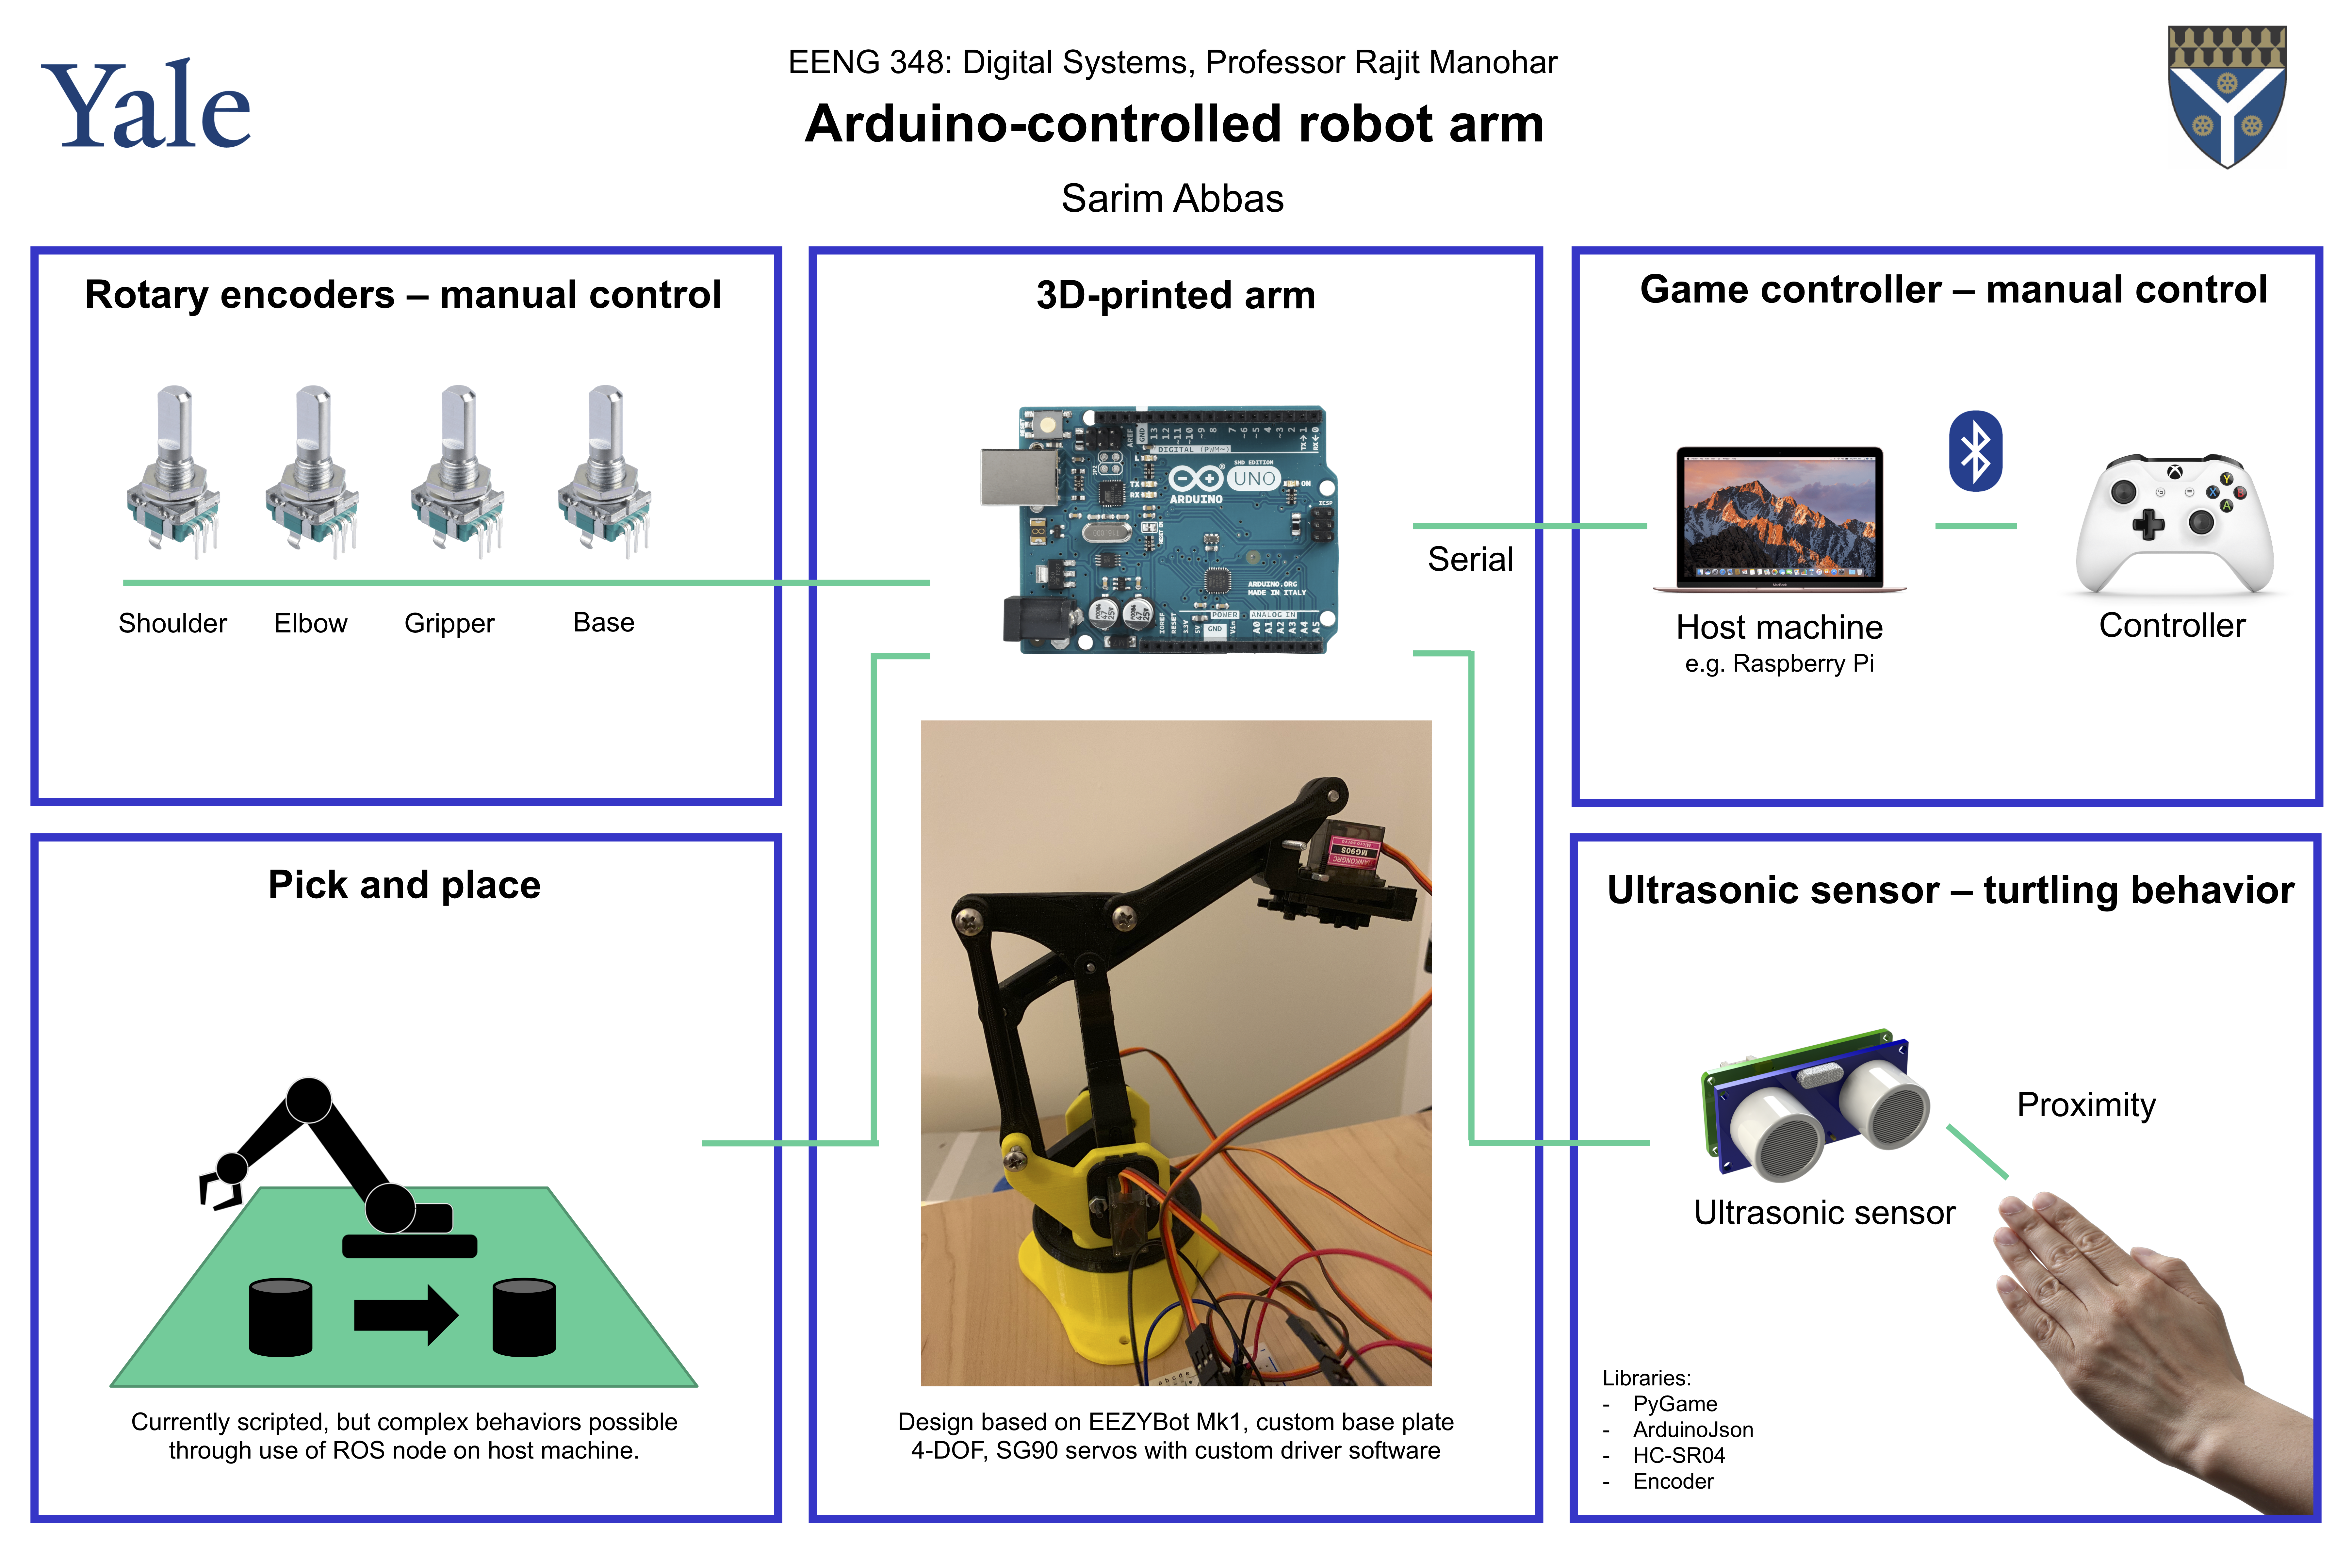
This project comprises of a 3D-printed robot arm with four separate software demos to give an idea of potential use cases. It was built for Yale's CS/EENG 338 Digital Systems class project.
The arm is based on the EEZYBot MK1. The parts were printed at Yale's Center for Engineering, Innovation and Design (CEID). A custom base plate was also designed and printed to house the various electrical components.
The robot arm has 4 DOF: waist/base, shoulder, elbow and gripper. In software, these are referred to as base/BS, upDown/UD, frontBack/FB and gripper/GR respectively.

Demos
The source code for this project can be found at https://github.com/sarimabbas/cs338-project.
Game controller - manual control
To use this demo, upload src/demo_2 to the Arduino. Then, open the controller script using python3 src/demo_2/controller.py. Make sure a controller is connected to your computer. The script has been tested with an Xbox One Wireless controller over Bluetooth.
Here are the controls:
- Moving the left stick left-right turns the robot base.
- Moving the left stick forward-backward turns the robot shoulder.
- Moving the right stick forward-backward turns the robot elbow.
- Pressing A opens and closes the gripper.
Here's a video of the interaction:
Rotary encoders - manual control
To use this demo, upload src/demo_0 to the Arduino. Make sure the servos are powered on.
You should be able to control each joint using a rotary encoder. The input saturates to a point - the joint can turn no further.
Here's a video of the interaction:
Pick and place
To use this demo, upload src/demo_1 to the Arduino.
The driver.hpp and driver.cpp files contain useful helper functions such as moveLeft() and moveUp() which can be used to script some interactions without writing much code. The movements are based on some thresholds that may be modified to adapt to different use cases.
These have been used to create some pick and place behavior. Here's a video of the interaction:
Ultrasonic sensor - turtling behavior
To use this demo, upload src/demo_3 to the Arduino.
The sensor is attached to the robot gripper ("the face") using adhesive.
When an object, e.g. human hand, gets too close, the robot retracts (as if into a shell). When the hand goes further away, the robot moves forward back to its original position, as if curious.
Here's a video of the interaction:
Future work
One idea was to run a ROS node on the Arduino using the rosserial_arduino package. However, ROS master requires a Linux device for maximum compatibility. A good candidate is a Raspberry Pi. However, compiling ROS on a Raspberry Pi takes a substantial amount of time. More promising are ready-made Raspbian images with ROS pre-installed that can be flashed onto the Raspberry Pi.
ROS opens up a number of possibilities. Using the pub/sub messaging system, it is possible to synchronize multiple processes (such as the four demos) to run together. It also opens up possibilities for integrations with numerous APIs such as speech recognition, camera tracking, services via webhooks etc.
Setup
Robot assembly
stl files and assembly instructions can be found here: http://www.eezyrobots.it/eba_mk1.html#.
Schematic/breadboard
Besides the robot, the following additional components are required:
- 1 - Arduino Uno
- 4 - rotary encoders
- 1 - HC-SR04 ultrasonic sensor
- 4 - SG90 servos
- 1 - 4xAA Battery holder (to power servos)
- Breadboard and wire
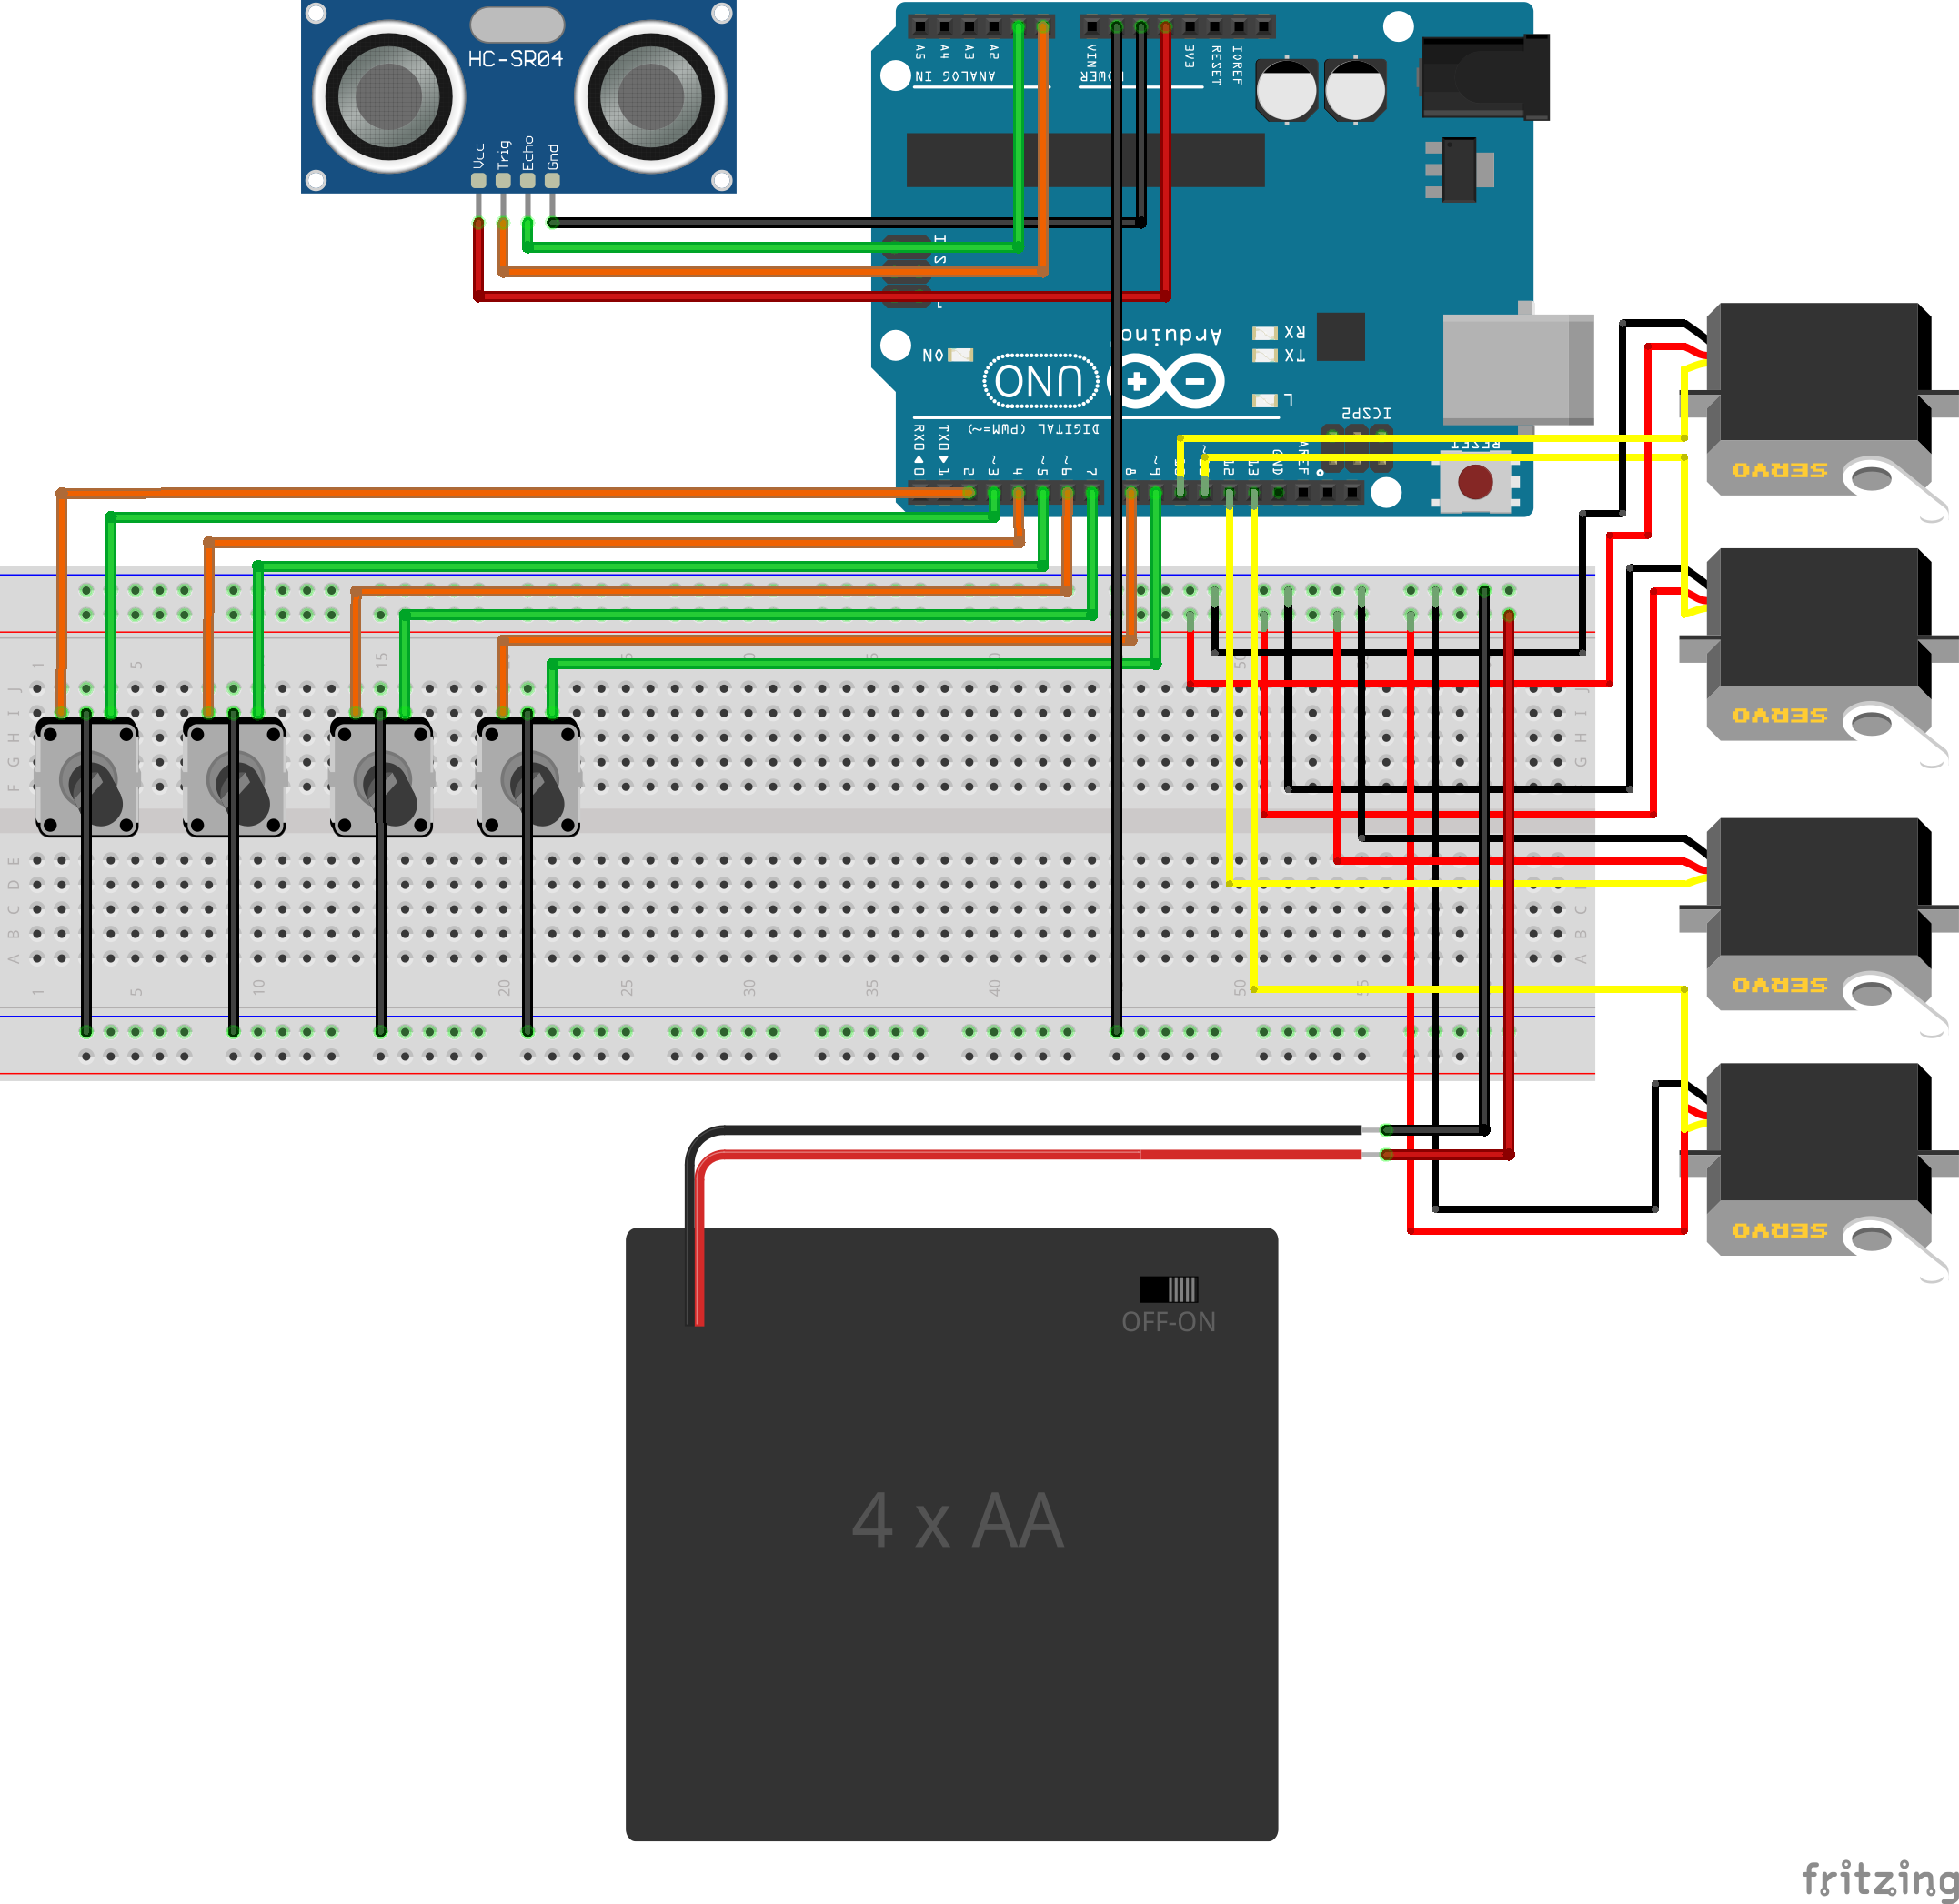
These are connected as per the following breadboard view:

Pin connections
The robot driver has a driverSetup() function which accepts pins for each servo. In the schematic, the following pins are used:
- frontBack/FB: 10
- upDown/UD: 11
- gripper/GR: 12
- base/BS: 13
The rotary encoders are connected to:
- frontBack/FB: 2, 3
- upDown/UD: 4, 5
- gripper/GR: 6, 7
- base/BS: 8, 9
Lastly, the HC-SR04 ultrasonic sensor is connected to:
- TRIG: A0
- ECHO: A1
Software
The Arduino IDE is required. Within the IDE, the following libraries must be installed:
- Encoder
- Bifrost for HC-SR04
- ArduinoJson
- Servo
A Python virtual environment is also required for the game controller demo. To create one:
# create environment
python3 -m venv ~/.virtualenvs/myVirtualEnv

# activate environment
source ~/.virtualenvs/myVirtualEnv/bin/activate

# install dependencies
pip3 install pygame
pip3 install pyserial
PyGame has a number of external dependencies which vary by OS. These can be installed by following this guide.
